Showing posts with label makeover. Show all posts

Friday, May 1, 2015

Pretty country style coffee table.

 
I purchased this coffee table at a yard sale last fall. It was part of a package deal for $40 that contained a large quantity of painting and craft supplies from an artist who was downsizing.  I originally went for the supplies, but loved this table ... a lot... and could picture it after receiving a little TLC.  I had anticipated having to pay over $40 for all the paint... there was a ton of it, so I consider this table a real bargain.


Of course it was like everything else  I plan on doing.  It took forever for me to actually get to it.  KC kitty didn't care though. She likes everything the way it is.


Last weekend we had some lovely warm sunshine happening so it was time to drag this baby out to the deck and get busy.
I have such a lovely work space when the weather co-operates.
This picture is closer to the real colour .... it had an orangy tone to it I didn't like.


I spent about an hour with my palm sander and took the top down to some really aged wood.  It had some marker and coffee mug stains so I'm thrilled at how clean the top turned out. 


Once I wiped it down really well with a damp micro fibre cloth to remove all the dust I brought it into the kitchen and put it up on the island upside down. If you follow me at all you know I usually just paint all my pieces so this project is a little different for me.


First the legs and skirt got two coats of white DIY chalky paint.  I didn't bother sanding this part first because I knew there'd be no problem with this paint sticking.  It's what I use for a hard core primer.


I let the paint dry well over night and then the next morning I gave the top a good coat of Minwax stain in Provincial.  I love the colour of this stain.  It's richly dark but still lets all the grain show through.  Notice there is no orange tone. 


Once it was dry I finished the top with a coat of Minwax shellac.  It's what I had left over from a previous project and I always try to use up what I already have. 


I love how it turned out.  It's really beautiful with a golden glow, and all the dark areas really pop.  I loved this table right from the start, but now I'm head over heels. 


Tuesday, April 28, 2015

Vintage Window makeover


I've had a few of these old windows hanging around for a while and finally decided I needed to do something with them.  

They were very dirty and had hardly any paint left on them.


I gave them a really good scrubbing with warm soapy water to get all the grunge off and then I gave them a rinse with some bleach added to the water to make sure there was no mold.


The putty holding the glass in was dried out and broken up.  I removed the broken bits and the glass was still nice and tight in the frame so it didn't take much to cover the edge.  I just used a bit of wood filler.


 I primed the window using some of my left over DIY chalky paint in black.  Once it was dry I painted it in this pretty grayish blue. 


I finished them up with a coat of dark paste wax and added some pretty white hooks


I had such a hard time taking pictures because it was such a rainy dark day.


This would look so pretty in an entry.  Maybe displaying some family photos behind the glass.
The nice big hooks would be great for coats and hats,  and little side hooks for keys or purses.

It would be wonderful in a bathroom for towels and robes too. 


   I  really like how this one turned out.


What do you think.  Entry or bathroom?  Or maybe you have another idea.  I'd love to hear it if you do.


Saturday, January 10, 2015

Chalk Boards for Staying Organized

Sometimes when you are thrift store shopping you will see items that are just so cheap that you know you need to add them to your junk stash.  This was what I made with just such an item.


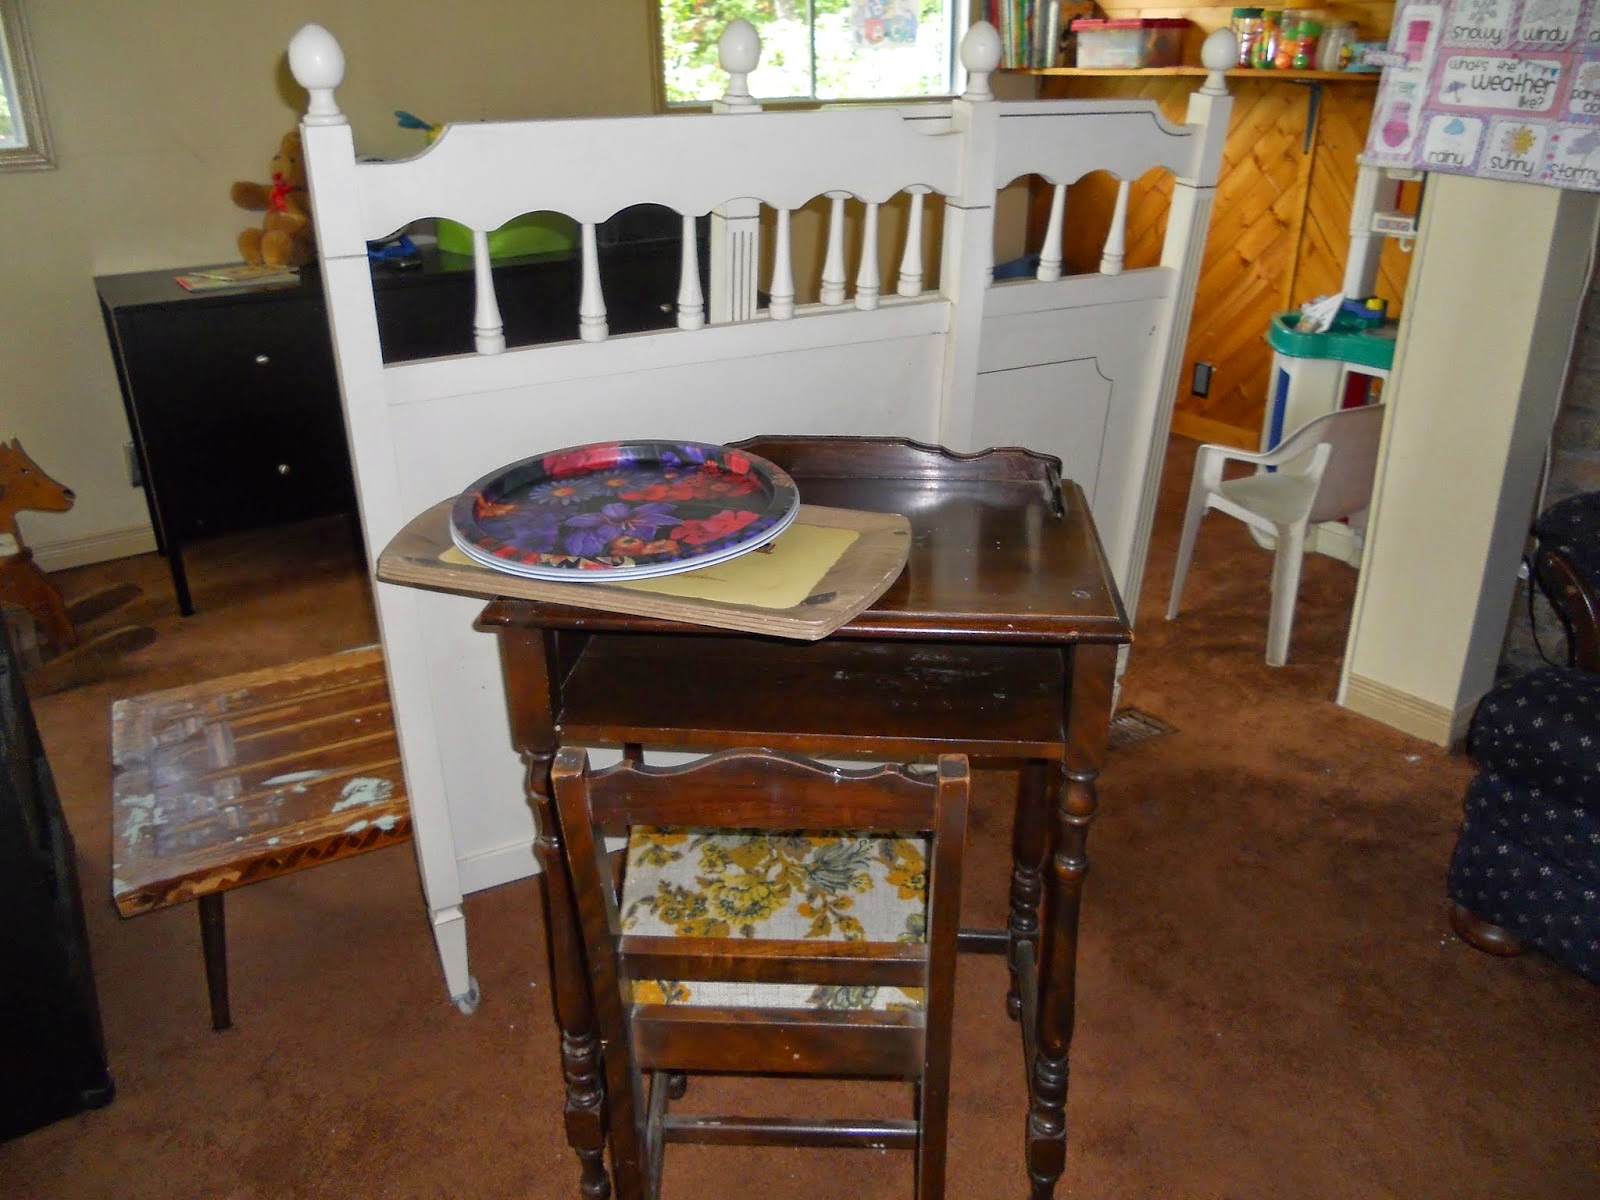
I was cruising for yard sales while on my way to my regular Saturday trip to the thrift store.  That's what I do on most Saturdays.  There was only one little sale and it didn't have much in the way of furniture pieces. I don't usually stop at those ones but I did this time and bought  a little stack of four trays. They were a pressed paper that kind of felt like wood and they were really tacky.  I bought them anyway....hey they were a dollar, what can I say.  I should have taken a better picture but they are on the table under the round bar trays.  On my way back from the thrift store there was another yard sale, right on my street.  That's where I bought the little desk and chair from this post.


I feel horrible admitting this, but on the day I found these I missed a baby shower that I had planned on attending. I had the gift wrapped and ready, and I just plain forgot.  I felt horrible.  I really needed something to keep track of appointments and invitations.  I grabbed the four trays and using my DIY chalky paint... I used the blue because it was already mixed and left over from a little desk set...  and painted the trays blue.  It only takes about 20 minutes for this paint to dry so I taped off the center of each tray and gave them a couple coats of black chalky paint.


Because these little trays where so light I hung them using a single command strip.


Above the little desk I had already done they make a perfect little command center.  I really shouldn't miss another baby shower, or any other event for that matter.  It's been a while since I completed this corner, but so far it's working for me. 

Wednesday, November 26, 2014

Barrel Shaped Side Table

I found this barrel shaped side table at a yard sale last summer and really couldn't  pass it by.  Some things just follow me home. Does that ever happen to you?


It has such beautiful details on the bottom edge and on the legs, as well as such pretty little feet.


The door has this great chicken wire detail along with just the perfect hardware.  I absolutely fell in love.  It went straight to my work room from the truck. All it needed was the perfect colour.
 
 
I started by removing the hardware and giving the whole piece inside and out a good wash with some vinegar and water.
 
I mixed one part of this gorgeous blue paint with three parts of white and made up my chalky paint mixture.
 
I painted the inside with the lighter blue. Have I said how much I love this colour.  Once the inside was dry I gave the outside, including the chicken wire, a coat of the lighter blue as well.  It's easy to paint the wire. just be sure to use a very dry brush to keep it from clumping up and dripping.
Once it was completely dry, about an hour, I gave it a second coat of paint.  The main part was the light blue mix, but  the door and top were painted with the original darker blue.
 
I finished it with some natural colour paste wax. I always use  Minwax furniture wax but I think any paste wax would do.
 
I used it's original hardware because the detail was so perfect.


What do you think?  Isn't it beautiful? 


Using 3 parts white with one part of the original colour makes it easy to do any piece in a two tone like this.  There is never any worry that the colours won't be a perfect match.


This chalky paint takes the paste wax really well and buffs up to a nice soft shine.


This table didn't take long to find it's forever home.  I was a little sad to see it go, but  I imagine it being enjoyed for a few more generations instead of being landfill and that makes me happy.


I'd love to hear from you.
Please leave a comment and tell me
what you think of todays post.

Tuesday, November 25, 2014

Some Forgotten Roadside Treasure


I have a couple of vintage doors that are causing me quite a dilemma.  While returning from a trip to the city last fall, (yep, almost a year ago)  I spotted a pile of doors and windows on the curb with the word "Free" posted on a raged cardboard box.  And of course free is our favorite word right?  So of course I put as much as I could in my vehicle and brought it home. I wonder what people thought with old doors hanging out the back of my truck and the back door tied down with my hoodie.  Note to self: keep a length of rope in vehicle at all times.

What an incredible find.  There were four Solid wood doors, very old, very chippy and very beautiful.  Two of them even had the glass intact.
And a  motel style double headboard as well. It was a bit dirty but  it still had the cleat attached to the back for mounting it to the wall. 
There were a few windows too but unfortunately they were too rotten to use  


So here is my dilemma.  It's almost  a year later and I still haven't figured out what I am doing with the doors. If you have ever checked out vintage doors on pinterest you would understand my dilemma. There are just too many choices.


I have given the headboard a paint job so I can use it in my guest room when we finally get it done. The room will be used by my granddaughter more than anyone so I'm thinking the "Coral Reef" paint colour from yesterday's post for the walls (Once I strip that awful wallpaper of course)  and maybe some shabby accessories.
What do you think?


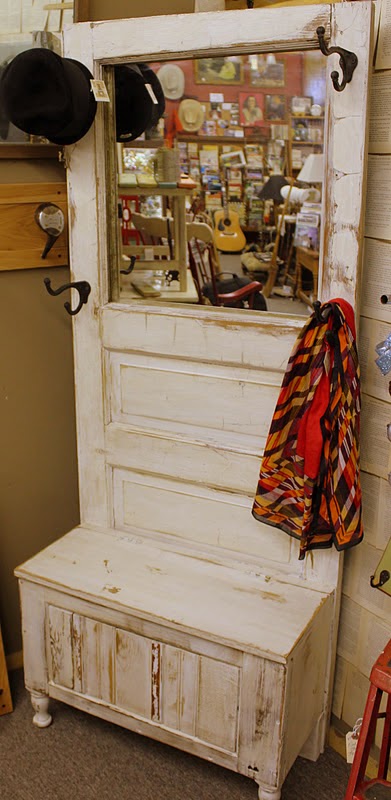
Back to the doors... I have been looking at projects made from old doors again recently  and am still undecided.  Here are a few of the pieces that I am inspired by. All I have to do is pick one ... Right?

http://bec4-beyondthepicketfence.blogspot.ca/2012/01/adooring-this-hall-tree.html
 
I love this Hall Tree from "Beyond the Picket Fence"  This blog is also one of my favorite places to spend a half hour with a cup of coffee.


This bookshelf is adorable. 


This one is an amazing piece of décor.


And  I'm in love with this beverage station from Finding Home


This is just a taste of why I can't decide.  Sometimes a piece will just tell you what it needs to be, but these doors are a bit wishy washy.  They keep changing their minds.
Check out the ton of possibilities on  Vintage Doors  on Pinterest .  Maybe you can point me in the right direction.


I'd love to hear from you.
Please leave a comment and tell me
what you think of todays post.


Thursday, November 20, 2014

Vintage Ladies Writing Desk

 
Isn't this little set absolutely adorable. 
 
 
I purchased this beautiful ladies desk at a yard sale and thought it was one of the nicest pieces I had come across since I started collecting projects.  Even with its terrible orange , yellow and brown flower   print seat,  and with one of the back cross pieces in the chair broken  it was a bargain at $20. 

I found a label on the bottom that said it was from a furniture place right here in Ontario in the early 1900's, and that made it even more appealing to me.

Normally with a piece of furniture of good quality I would try to refinish, but this one needed some wood filler and that doesn't take stain very well.  So I decided to paint.  This is the first piece of furniture I ever painted using my own mix of chalky paint.  I know everyone's recipe is a little different, but this is the one I use.  I can't remember where I found it but I googled it of course.
I mix 1/2 cup of Plaster of Paris into 1/2 cup of warm water. 
I add to this mix 1 + 1/2 cups of regular latex paint. 
I have found any brand of paint works but don't use the paint with primer combo. What I love about it?...it covers any surface and you don't need to sand and prime first.  yay


The desk and chair I painted 2 coats with this pretty blue I had on hand, and let it dry really well. Then I used a sand block to lightly distress the corners and edges, and where I thought it might wear naturally.  I just wanted to give it a pretty shabby chic look. Then I finished both pieces with a natural colour paste wax for furniture.  This rubs on over the chalky paint so easily and when almost dry it buffs to such a pretty shine.  As a protective finish this is very good.  I love it because if some time down the road your piece needs a touch up it is very easy to rewax and buff.


Then I had to tackle the awful dated seat. 


I looked for a small remnant that I could use ,this blue print was as close as I could find at the time.

Overall I like how it turned out, but I'm still not sure of the upholstery.  I might look for something a little different.  What do you think?

I'd love to hear from you.
Please leave a comment and tell me
what you think of todays post.

Tuesday, November 18, 2014

The perfect pair of Chairs.

Aren't these chairs pretty. elegant.
This is the first time I've done over a pair of matching chairs and I must say I am really happy how they turned out.


And this is what they looked like when I got them.  You can see why I'm so pleased with the end result. 


I removed the seats and gave both chairs 2 coats of my own chalky paint. This colour was a mixing mistake at the hardware store.  What I call oops paint.  I always check whenever I'm in any paint department to see if they have any of these mistakes.  Often I can find colours I like for very cheap. This is definitely one of those colours. It's almost the colour of graphite. When the paint was completely dry I finished them off with a coat of dark furniture wax.


The seats were recovered in this great fabric. I love the pattern.  I actually recovered one seat twice.  The first time I did them I didn't match the pattern on both chairs and didn't like that they weren't the same. 


So I redid the second one to match and am really glad I did.


I like that these chairs will look just as nice in a bedroom or living room and can be used as extra seating in the dining room for those big family meals.
 Where would you put these if they were in your home?
 
 
I'd love to hear from you.
Please leave a comment and tell me
what you think of todays post.